The Amazon Web Services integration allows you to ingest metrics directly from AWS to VMware Tanzu Observability (formerly known as VMware Aria Operations for Applications). In addition to setting up and managing the AWS integration through the UI, you can also use the REST API for setting up and managing the AWS integration. This doc page provides some basic steps and examples on how to do this.
In these examples, you access the REST API through the interface, so that you don’t need to provide the Bearer token.
Before You Start
To set up the Amazon Web Services integration, you must provide Tanzu Observability with read-only access to your Amazon account. To do that, you need to provide an account ID and external ID. While the account ID is a constant value - the ID to which you want to grant access to your resources, the external ID is not a constant value. The external ID is a secret identifier that is known by you and Tanzu Observability (the third-party). The external ID is time-sensitive and regenerated each time you reopen the AWS Integration setup page, and you cannot reuse it.
For information about external IDs and how they are used in AWS, see How to Use External ID When Granting Access to Your AWS Resources.
For more information, see Giving Access to Your AWS Account.
Create an External ID
- Log in to your product cluster.
- Click the gear icon in the top right and select API Documentation.
- Expand the Cloud Integration category.
- To create an external ID, click the
POST /api/v2/cloudintegration/awsExternalIdrequest. - Click Execute.
-
Copy the external ID from the response body of the request.
 {
 "status": {
     "result": "OK",
     "message": "",
     "code": 200
   },
 "response": "<external-ID>"
 }
Provide Read-Only Access to Your Amazon Account and Get the Role ARN
- Log in to your AWS account.
- Search for the IAM (AWS Identity and Access Management) service and click it.
- Under Access management on the left, click Roles.
- Click Create role.
- Click the AWS account tile, and select the Another AWS account radio button.
- Enter the account information:
- Account ID - The identifier of the account to which you want to grant access.
To get the account ID:
- Navigate to your product cluster (
https://<example>.wavefront.com). - Click Integrations on the toolbar and click the Amazon Web Services integration tile.
- Click the Setup tab and click the How to get Role ARN link.
- Copy the Account ID displayed in the instructions.
- Navigate to your product cluster (
-
Select the Require external ID check box and provide the external ID that you have copied.
You can also copy and paste the External ID displayed in the instructions on the Amazon Web Services integration Setup page (in the Tanzu Observability GUI).
- Account ID - The identifier of the account to which you want to grant access.
To get the account ID:
- Click Next.
- On the Add permissions screen, search for, and select the ReadOnlyAccess check box.
- Click Next.
- In the Role name text box, provide a unique name of the role and click Create role.
- On the Roles page, click the newly created role.
- Copy the ARN value, so that you can use it when you configure your AWS integration.
Set Up an AWS Integration
You can add an AWS integration by using the REST API documentation UI.
- Log in to your product cluster.
- Click the gear icon in the top right and select API Documentation.
- Expand the Cloud Integration category.
- To add a new cloud integration, click the
POST /api/v2/cloudintegrationrequest. -
To add an integration, in the Edit Value text box enter one of the following examples for each AWS integration.
You can add one integration at a time. You cannot use a single API request to register all AWS services together.
-
CloudWatch integration:
{ "name":"CloudWatch integration", "service":"CLOUDWATCH", "cloudWatch":{ "baseCredentials":{ "roleArn":"arn:aws:iam::<accountid>:role/<rolename>", "externalId":"string" }, "metricFilterRegex":"^aws.(sqs|ec2|ebs|elb).*$", "pointTagFilterRegex":"(region|name)" }, "serviceRefreshRateInMins":5 } -
AWS Metrics+ integration:
{ "name": "AWSMetric+ integration", "service": "ec2", "ec2": { "baseCredentials": { "roleArn": "arn:aws:iam::<accountid>:role/<rolename>", "externalId": "string" }, "instanceSelectionTagsExpr": "string", "volumeSelectionTagsExpr": "string", "metricFilterRegex": "^aws.(sqs|ec2|ebs|elb).*$", "pointTagFilterRegex": "(region|name)", "hostNameTags": [ "string" ], "customNamespaces": [ "LIMITS" ] }, "serviceRefreshRateInMins": 5 }Note: If you want to disable the ingestion of support service limit metrics (also known as service quotas), that is, the metrics with the namespace
aws.limits.*, replace"customNamespaces":["LIMITS"]with"customNamespaces":[]. -
CloudTrail integration:
{
 "name":"CloudTrail integration",
 "service":"cloudTrail",
 "region":"string",
 "prefix": "string",
 "bucketName":"string"
 "cloudTrail":{
  "baseCredentials":{
      "roleArn":"arn:aws:iam::<accountid>:role/<rolename>",
      "externalId":"string"
  },
  "filterRule":"string"
 },
}
In these examples, the
roleArnvalue is the Role ARN from your Amazon account, and theexternalIdvalue is the external ID that you have provided while you created the role. If you don’t provide an external ID, the request will time out. -
- Click Execute.
Update an AWS Integration
You can update an AWS integration through the API. You do not need the external ID value to update an existing AWS integration.
In this example, we update an existing CloudWatch integration to retrieve the service metrics for 10 more services in addition to DynamoDB:
- EBS
- ApiGateway
- EC2
- ELB
- ElastiCache
- ApplicationELB
- SES
- NATGateway
- AutoScaling
- RDS
We also add the metrics for these services to a metric allow list by using a regular expression and change the service refresh rate from 5 to 10 minutes.
- In the REST API documentation UI, click the
GET/api/v2/cloudintegrationrequest. -
Click Execute.
In the Response Body section, under
namespacesyou can see the list of all configured cloud services integrations. For example:{ "forceSave": false, "name": "AWS", "id": "aaaaaaaa-bbbb-cccc-dddd-eeeeeeee", "service": "CLOUDWATCH", "lastReceivedDataPointMs": 1634038298092, "lastMetricCount": 210, "cloudWatch": { "namespaces": [ "AWS/DynamoDB" ], "metricFilterRegex": "", "baseCredentials": { "roleArn": "arn:aws:iam::<accountid>:role/<rolename>" }, "pointTagFilterRegex": "", "instanceSelectionTags": {}, "volumeSelectionTags": {} }, "disabled": false, "lastProcessorId": "3198d07c-210c-4670-9bd0-eb407d2a71dc", "lastProcessingTimestamp": 1634038421682, "createdEpochMillis": 1620216033503, "updatedEpochMillis": 1622707203597, "serviceRefreshRateInMins": 5, "deleted": false, "inTrash": false, "lastErrorEvent": { ... ... "creatorId": "user-account-email-address", "updaterId": "user-account-email-address" },In this example, you can see that the CloudWatch integration retrieves only DynamoDB metrics and that the service refresh rate is 5 minutes.
- Copy the value of the
"id"parameter of the integration that you want to update. - Copy the content of the response in a text file.
-
Edit the copied response body.
-
To update the list of services, under
"namespaces", add the list of services: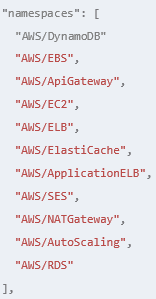
-
To add the regular expression, under the list of services, add the following
"metricFilterRegex"value:
-
To change the service refresh rate to 10 minutes, update the
"serviceRefreshRateInMins"value:
The updated response body will look like that:
{ "id": "aaaaaaaa-bbbb-cccc-dddd-eeeeeeee", "name":"AWS", "service":"CLOUDWATCH", "cloudWatch":{ "namespaces": [ "AWS/DynamoDB" "AWS/EBS", "AWS/ApiGateway", "AWS/EC2", "AWS/ELB", "AWS/ElastiCache", "AWS/ApplicationELB", "AWS/SES", "AWS/NATGateway", "AWS/AutoScaling", "AWS/RDS" ], "metricFilterRegex":^(aws.(ecs|ses|instance|autoscaling|sqs|sns|reservedInstance|ebs|route53.health|ec2.status|ec2.cpuutilization|ec2.network|ec2.autoscaling|autoscaling|elb|dynamodb|kinesis|firehose|s3|applicationelb|networkelb|lambda|rds|elasticache|applicationelb|natgateway).*), "pointTagFilterRegex": "", "baseCredentials":{ "roleArn":"arn:aws:iam::<accountid>:role/<rolename>" }, "instanceSelectionTags": {}, "volumeSelectionTags": {} } }, "disabled": false, "lastProcessorId": "3198d07c-210c-4670-9bd0-eb407d2a71dc", "lastProcessingTimestamp": 1634038421682, "createdEpochMillis": 1620216033503, "updatedEpochMillis": 1622707203597, "serviceRefreshRateInMins": 10, "deleted": false, "inTrash": false, "lastErrorEvent": { ... ... "creatorId": "user-account-email-address", "updaterId": "user-account-email-address" }, -
- In the REST API documentation UI, click the
PUT /api/v2/cloudintegration/{id}request. - Under Parameters, in the id text box enter the ID of the integration that you want to update.
- In Edit Value text box enter the edited response body with the new services.
- Click Execute.
- Verify that the response returns
200status code to indicate that the update was successful.
Enable and Disable an AWS Integration
Tanzu Observability automatically disables integrations that are experiencing errors due to invalid credentials. To enable an integration after the credential has been corrected or to manually disable an integration, you need the integration ID.
- In the REST API documentation UI, click the
GET/api/v2/cloudintegrationrequest. -
Click Execute.
In the Response Body section, you can see the list of all configured cloud services integrations. For example for an AWS integration you see:
{ "forceSave": false, "name": "AWS", "id": "aaaaaaaa-bbbb-cccc-dddd-eeeeeeee", "service": "CLOUDWATCH", "lastReceivedDataPointMs": 1634038298092, "lastMetricCount": 210, "cloudWatch": { "namespaces": [ "AWS/DynamoDB" ], "metricFilterRegex": "", "baseCredentials": { "roleArn": "arn:aws:iam::<accountid>:role/<rolename>" }, "pointTagFilterRegex": "", "instanceSelectionTags": {}, "volumeSelectionTags": {} }, "disabled": false, "lastProcessorId": "3198d07c-210c-4670-9bd0-eb407d2a71dc", "lastProcessingTimestamp": 1634038421682, "createdEpochMillis": 1620216033503, "updatedEpochMillis": 1622707203597, "serviceRefreshRateInMins": 5, "deleted": false, "inTrash": false, "lastErrorEvent": { ... ... "creatorId": "user-account-email-address", "updaterId": "user-account-email-address" }, - Copy the value of the
"id"parameter of the cloud integration that you want to enable or disable. - To enable the integration, run the
POST /api/v2/cloudintegration/{id}/enablerequest with the ID of the integration that you want to enable. - To disable the integration, run the
POST /api/v2/cloudintegration/{id}/disablerequest with the ID of the integration that you want to disable.
Delete and Recover a Deleted AWS Integration
To delete a cloud service integration that you no longer want to use, you need the integration ID. If you decide to move the integration to the recycle bin, you can recover it at a later stage.
- In the REST API documentation UI, click the
GET/api/v2/cloudintegrationrequest. -
Click Execute.
In the Response Body section, you can see the list of all configured cloud services integrations. For example:
{ "forceSave": false, "name": "AWS", "id": "aaaaaaaa-bbbb-cccc-dddd-eeeeeeee", "service": "CLOUDWATCH", "lastReceivedDataPointMs": 1634038298092, "lastMetricCount": 210, "cloudWatch": { "namespaces": [ "AWS/DynamoDB" ], "metricFilterRegex": "", "baseCredentials": { "roleArn": "arn:aws:iam::<accountid>:role/<rolename>" }, "pointTagFilterRegex": "", "instanceSelectionTags": {}, "volumeSelectionTags": {} }, "disabled": false, "lastProcessorId": "3198d07c-210c-4670-9bd0-eb407d2a71dc", "lastProcessingTimestamp": 1634038421682, "createdEpochMillis": 1620216033503, "updatedEpochMillis": 1622707203597, "serviceRefreshRateInMins": 5, "deleted": false, "inTrash": false, "lastErrorEvent": { ... ... "creatorId": "user-account-email-address", "updaterId": "user-account-email-address" }, - Copy the value of the
"id"parameter of the integration that you want to delete. - To delete the integration, click the
DELETE /api/v2/cloudintegration/{id}request.- Under Parameters, in the id text box enter the ID of the integration that you want to delete.
-
From the skipTrash drop-down menu select whether you want to keep the deleted integration in the recycle bin.
- Select false, to move the integration to the recycle bin, so that you can recover it at a later stage.
- Select true, to delete the integration forever. You won’t be able to recover it.
- Click Execute.
- To recover an integration from the recycle bin, i.e., an integration that was not permanently deleted, in the REST API documentation UI, click the
POST /api/v2/cloudintegration/{id}/undeleterequest.- Under Parameters, in the id text box enter the ID of the integration that you want to recover.
- Click Execute.